How to Downgrade WordPress version to any previous version in 2024
In 2024, it is very easy to downgrade the WordPress version.
This article is written based on my recent experience. My friend started facing issues with his WordPress website after the recent WordPress 6 update.
The WordPress version upgrade was set to automatic, which broke the custom theme. On top of that, the theme developers did not push a new update quickly to fix the bug. Therefore, we contacted the host for the backup, which was unfortunately a month older.
Finally, I decided to check the possibility of downgrading the WordPress version back to the working one. Thanks to search engines and all those authors who had written articles on how to downgrade a WordPress version, we tried a couple of options, and voila, the blog was up and running fine.
In this article, I will discuss about various options in detail to downgrade WordPress version without loosing any data and theme settings.
Option 1: Downgrade WordPress version using WP Downgrade plugin
The WP Downgrade plugin allows you to downgrade a WordPress version and also control the version for the next update. I found this plugin very simple and easy to use.
Step 1: Install WP Downgrade plugin
Install WP Downgrade plugin from plugins options form your WordPress admin panel and activate it. Once done do backup your website home directory and database before proceeding to the next step.
Step 2: WP Downgrade plugin settings
Click on Settings option present in main menu and got to WP Downgrade option. The page will display details as in below image:
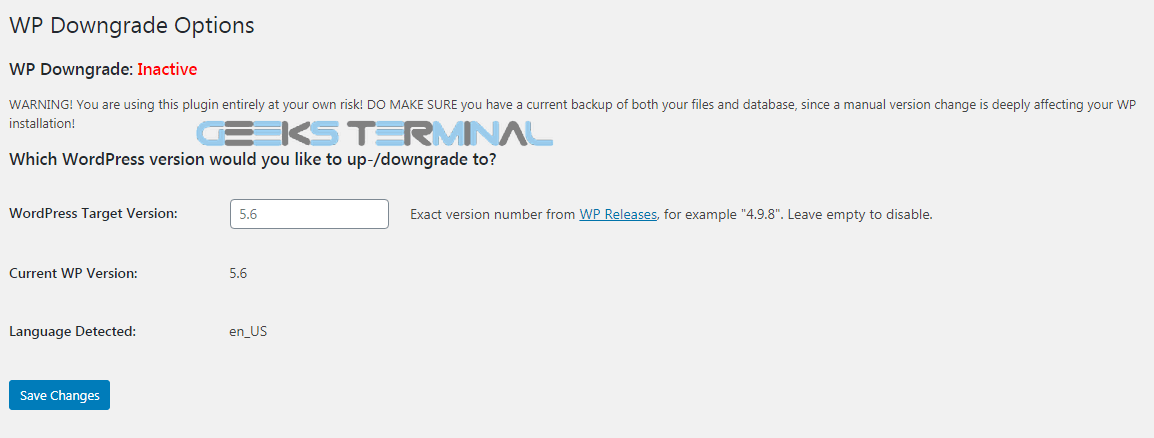
By default the WordPress Target Version would be set to the latest version and Current WP Version would be your websites current WordPress version.
Provide the WordPress version you wish to downgrade in WordPress Target Version and click on Save Changes. For example, in below image WordPress version 5.5.3 has been provided.
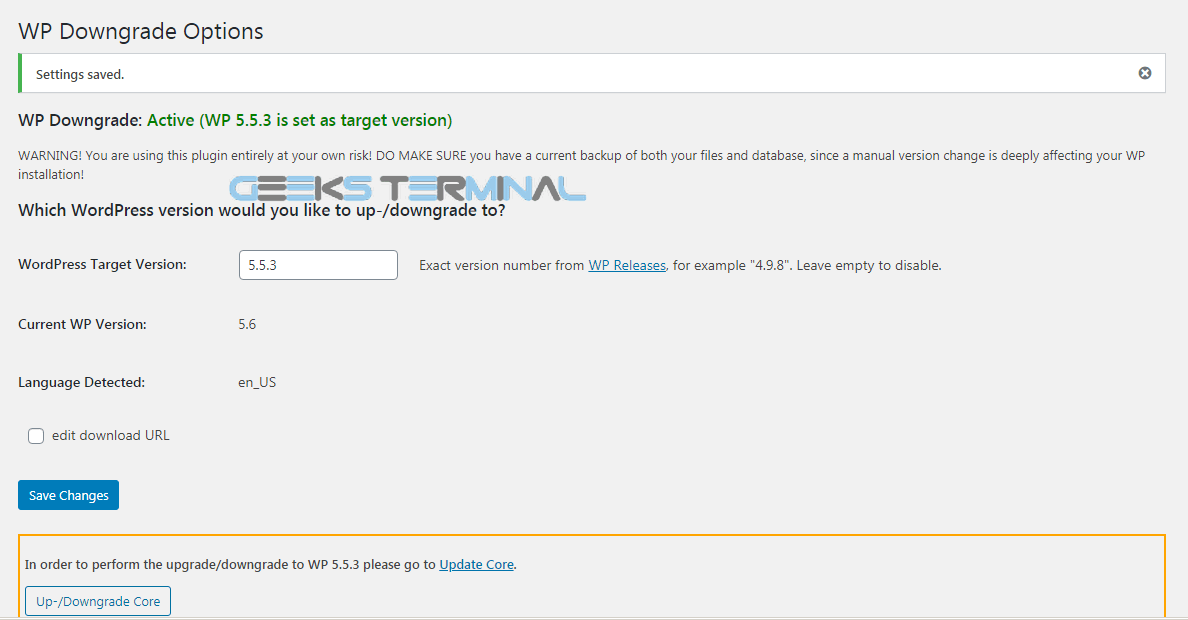
Posting saving changes, you will receive notification to go to the Updates option for downgrading the WordPress version.
Step 3: Downgrade WordPress version
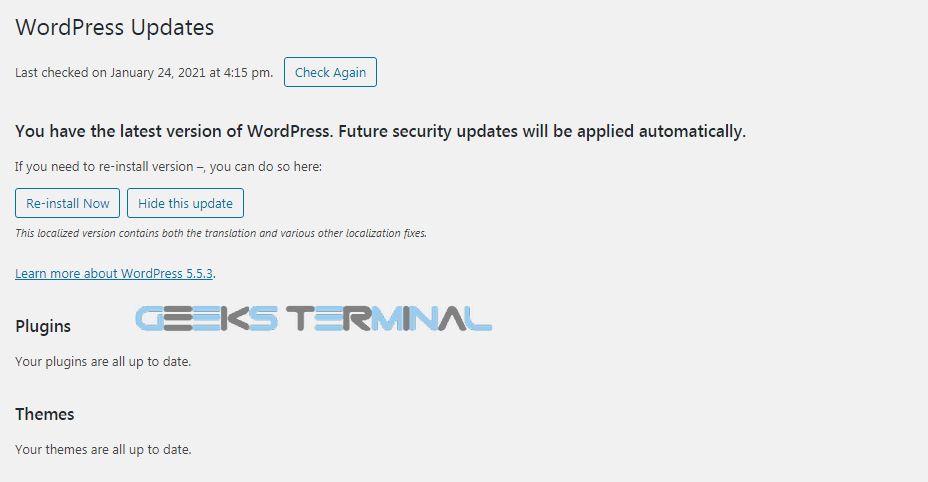
On clicking Updates option from main menu, the details as in following image will be displayed. We now gett an option to re-install WordPress version 5.5.3 i.e. to rollback WordPress version from 5.6. Click on Re-install Now option to begin with downgrading WordPress version.
The downgrade will take around 5-10 minutes depending on several factors. After successful downgrade, the Updates option will show the current WordPress version as 5.5.3. Empty all cache in case if you are using any WordPress cache plugin or CDN.
Re-install WordPress using WP Downgrade:
To re-install current version then switch to another version and start the re-install activity.
Return to WordPress updates channel using WP Downgrade:
If you wish to get regular updates from WordPress then go to WP Downgrade settings and remove the version from WordPress Target Version, keep it blank and save the changes.
Option 2: Downgrade WordPress version manually
In this option, we will discuss the steps to manually downgrade WordPress version. Before that, make sure you have hosting account file manager write access, FTP client and FTP account login details. Many web hosting providers provide different control panels like cPanel, Plesk to manage hosting account. Some web hosting providers like GoDaddy, Bluehost provide custom control panel. Using these control panel, you can create FTP account and also manage the files.
Step 1: Backup existing website
Take backup of WordPress installation folder located on the server including database. Deactivate all the plugins and log out from WordPress admin panel.
Step 2: Download WordPress setup
Download the previous WordPress release version that you want to downgrade from official WordPress site and extract the archive.
Step 3: Connect website hosting using FTP
Connect to your server hosting account using FTP client and navigate to the website home directory where WordPress installation is present. Then delete wp-admin, wp-includes folders only.
Note : Do not delete wp-content folder else you will loose all your uploads, plugins and themes data.
Step 4: Overwrite WordPress
Upload & overwrite all the files and folders except wp-content folder and wp-config file from the recently downloaded WordPress setup that you want to downgrade.
Step 5: Post downgrade activities
After successful upload, accessing your website or login panel may prompt for database upgrade. Proceed with the database upgrade and login into the admin panel where you will find the downgraded WordPress version. Activate all the deactivated plugins one by one. Verify if website is working as expected and activate cache plugin & CDN. Flush all cache from plugin and CDN.
In conclusion, you can either use WordPress plugin or follow manual steps to downgrade your website WordPress version.
It is not recommended to stay longer on old WordPress version considering security and features pushed to the latest WordPress releases.
Happy WordPress downgrading!
plugin is very useful, is it fine to keep it disabled?