How To configure TP-Link Archer C80 AC1900 router as WiFi repeater extender
The TP-Link Archer C80 AC1900 MU-MIMO Wi-Fi Wireless Router is a MU-MIMO, full Gigabit high-performance router commonly used for home automation. The router supports Mesh and IoT, which makes it useful to cover more areas and interests.
There are scenarios where ISP provided router should be used as a primary source, which are basic with limited Wi-Fi coverage and a lack of MIMO options. In such a case, using personal router in repeater or extender mode is very useful to overcome the negative areas and increase the overall WiFi network performance; it should be used in WiFi repeater or extender mode.
Unfortunately, setting up the TP-Link Archer C80 router in WiFi repeater or extender mode is not easy, nor does the company provide the setup guide. Therefore, in this article, I am going to discuss these points.
Steps to configure TP-Link Archer C80 router as repeater or extender router
Step 1: Reset TP-Link Archer C80 AC1900 router
In order to start with the setup, keep the LAN patch cable ready, and the workstation is not connected to any other network. Plug in the LAN cable to the router's LAN port and the other end to the workstation's LAN port. Reset the router by clicking on the reset button, using a pointed needle or pin, by pressing for 3 to 5 seconds till the router turns off.
Step 2: Initial setup of TP-Link Archer C80 AC1900 router after reset
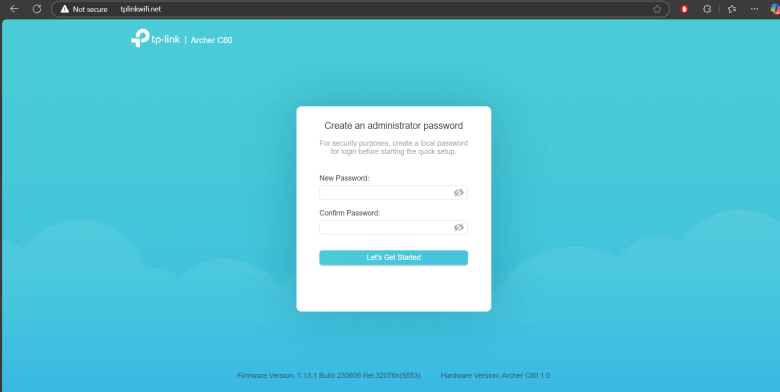
Once the router is booted, open http://tplinkwifi.net/ in any browser. It will display the password setup page.
The next page will prompt you to set up your time zone.
On this page, create an SSID based on your preferences.
These steps will complete the initial setup, and settings will get applied to the router.
Step 3: Configure TP-Link Archer C80 AC1900 router as Wi-Fi repeater or extender
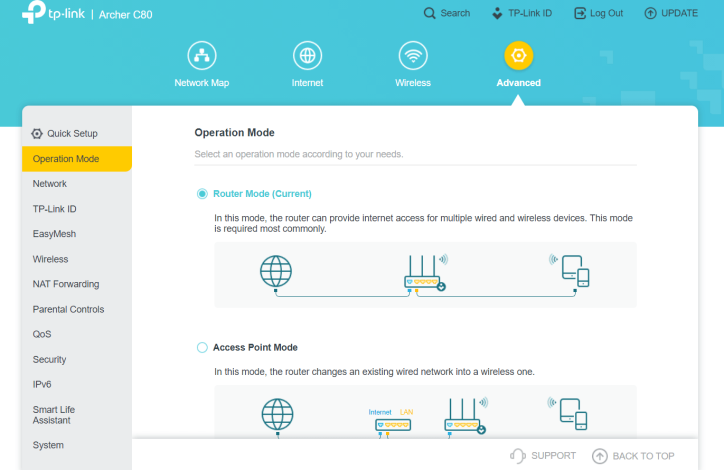
On this page, multiple options will be displayed. Select the Advances option as shown in the following image.
On the left-hand side, a couple of setting options are present. By default, the page will display Operation Mode, which should be set to Router Mode as shown in the above image.
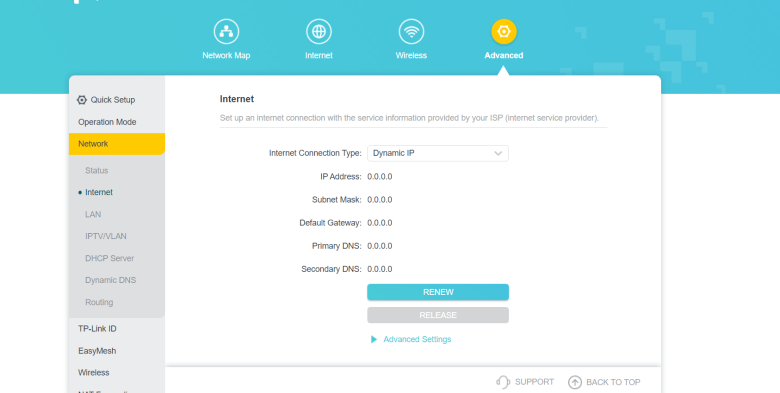
Click on the Network option, which will display a couple more options present under it. The status option will display the current internet status, which is nothing but default as shown in the following image.
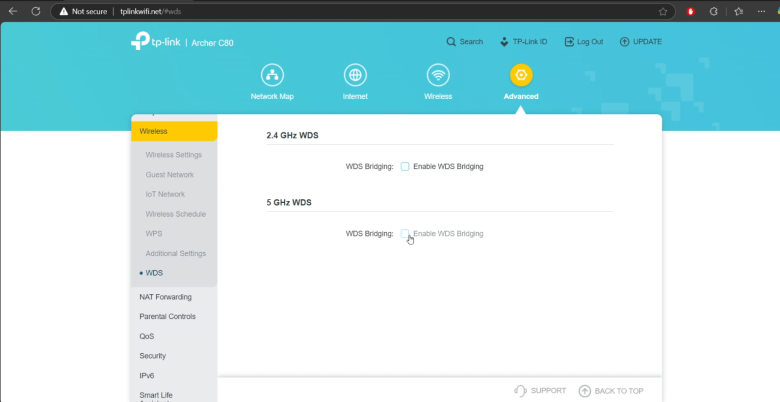
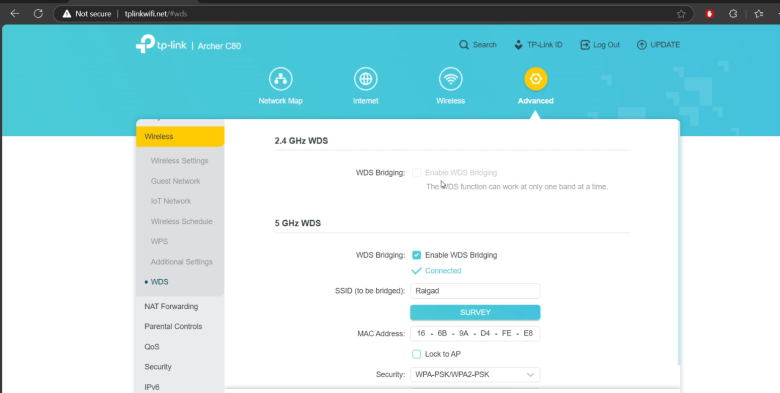
Let's connect the TP-Link router to the main router using the WDS option. The WDS option is present under Wireless. Under WDS, select the main router SSID to connect, which is also called WDS bridging.
Click on Enable WDS Bridging and search for the SSID to connect with. After a successful connection, a connected message will be displayed.
Note - If you are going to use WAN port then WDS bridging is not required.
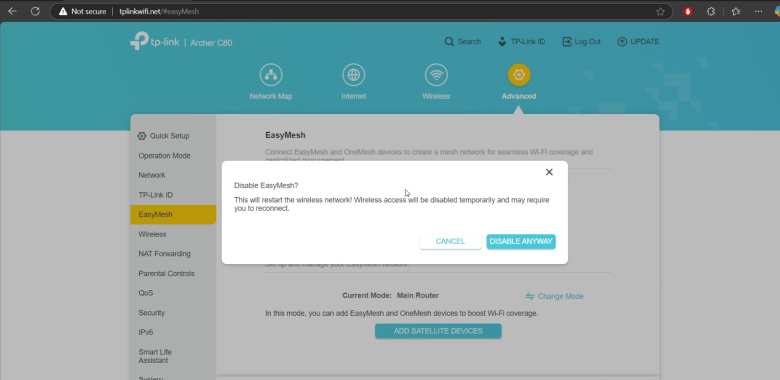
The router comes with the EasyMesh option enabled by default. Since we are going to use this router as a Wi-Fi repeater or extender, disable this option as shown in the following image.
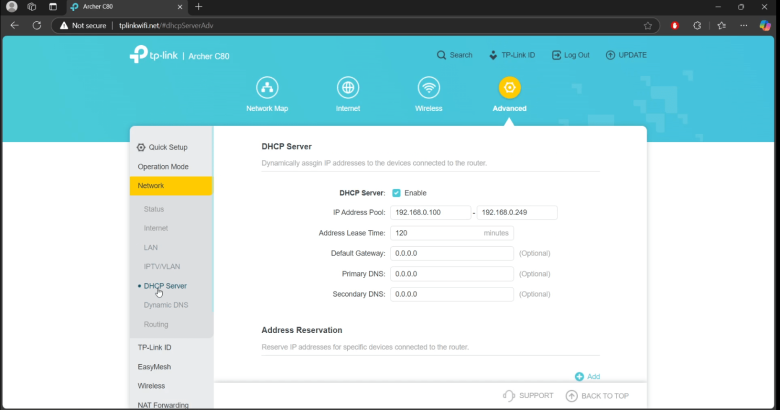
Disable the DHCP server in the Wi-Fi repeater or extender to prevent IP conflicts. By default, the DHCP server option in the DHCP server should be enabled.
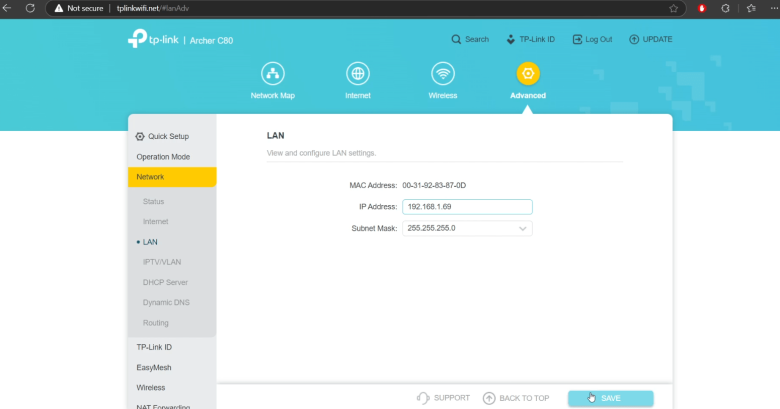
After disabling DNS, navigate to the LAN option under Network. The main router IP range must be noted down. Suppose the connected devices have an IP range of 192.168.1.x; then update the IP address under LAN to something like 192.168.1.69, which cannot be assigned easily to any other device on the main router.
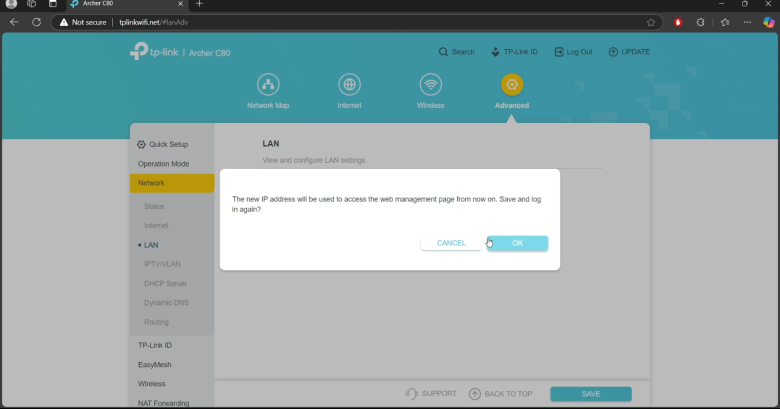
After saving the IP address, the router will prompt the following message. The setup is not yet complete, so do not log out of the router.
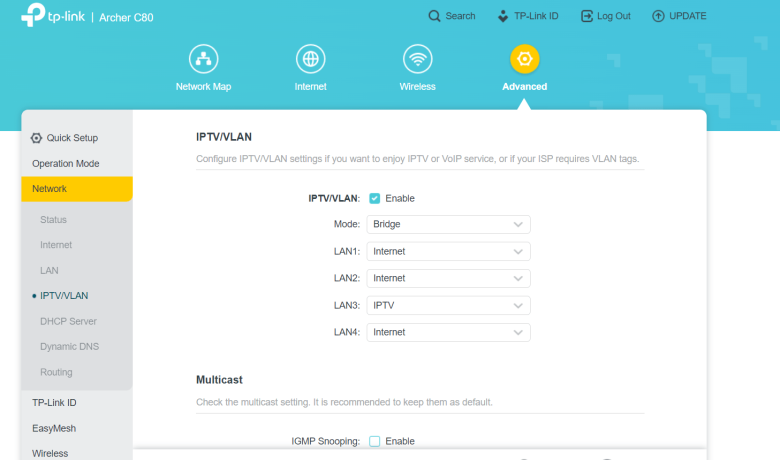
Devices can connect to the repeater or extender Wi-Fi using the wireless SSID with the current configuration. However, to connect via the LAN port, the IPTV/VLAN option needs to be updated.
Open the IPTV/VLAN option present under Network. The IPTV/VLAN option is disabled by default. Enable this option and set the mode to bridge. There will be LAN options displayed containing LAN port serial numbers, and the corresponding value can be selected using the drop-down options. The Internet and IPTV will be present in the drop-down. Select any one of the respective LAN options. The Internet option will enable the LAN port to deliver the internet when connected via LAN patch cable. The IPTV option will enable the LAN port to configure IPTV.
Reboot the router from System, Reboot option.
Step 4: Verification
After rebooting the TP-Link Wi-Fi repeater router, connect to the wireless SSID and verify that the internet is functioning properly. Now disconnect from all wireless SSIDs and connect the Wi-Fi repeater or extender router via LAN cable. Verify whether internet connectivity is working fine.
Check if the IP address provided in the LAN option during TP-Link Wi-Fi repeater and extender router setup allows access to the device's admin page.
Hope you have found this article helpful in easily configuring your router in repeater or extender mode. Do provide feedback or post queries in the comments section.
