Jenkins is an open source software widely used primarily for continuous integration and to orchestrate continuous delivery. You are probably here because you are looking to install Jenkins on Windows. So, let's come to the point and start with the tutorial.
Jenkins installation per-requisites:
Hardware requirements:
Minimum hardware required for Jenkins to run is 256 MB of RAM and 10 GB of disk space. The recommended hardware configuration is 2GB+ of RAM and 50 GB+ of disk space.
Since Jenkins is coded in Java and can run in standalone container, Java is the primary requirement and a Web browser to run the Jenkins portal. Please refer to this page to know more about Java requirements.
Jenkins setup download:
Jenkins can be downloaded from the Jenkins official page. There are two types releases available, Long Term Support (LTS) and Weekly. Depending on the requirement select the proper release. Click on Windows option to download Jenkins setup.
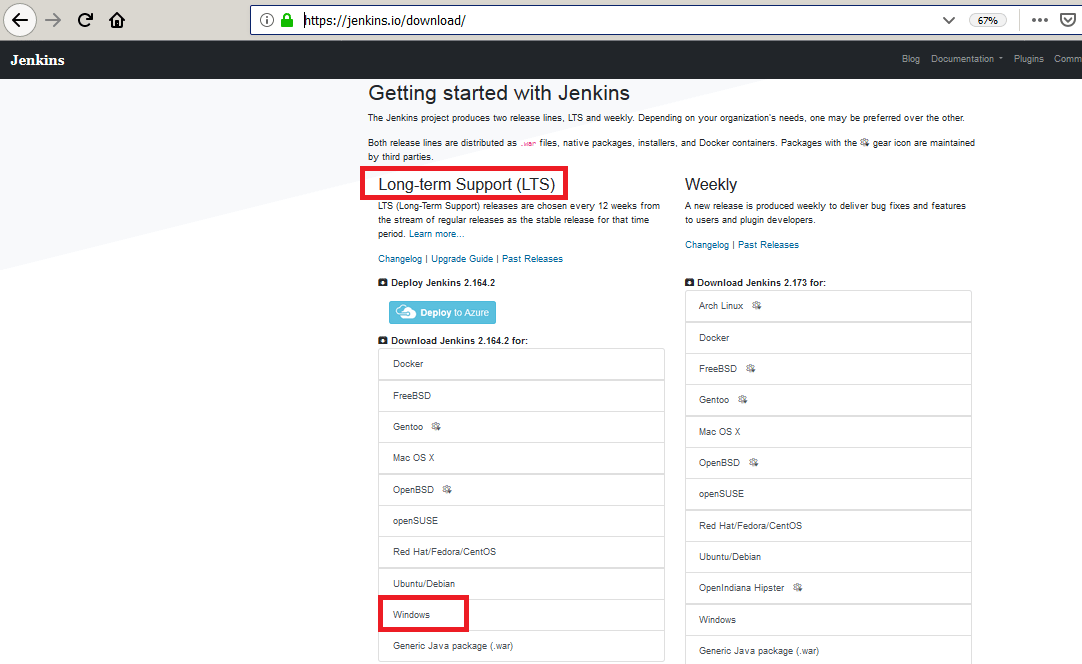
Interesting Fact - The Jenkins setup can also be downloaded in generic Java package i.e. WAR and application server like Apache Tomcat can be used to run the Jenkins. But for Windows, we will go with the Jenkins standard Windows installer.
The jenkins-xxx.zip archive will get downloaded on your system. On extracting the archive, you will get the jenkins.msi Windows installer package.
Jenkins installation steps on Windows 7, 8, and 10 Operating System:
Step 1:
Double click on the jenkins.msi installer which will run the windows installer service. Click on the Next option and it will take you to the new screen as in the below image:

It will take by default Windows Program Files folder for installation as highlighted in the above image. You may change it by clicking on Change option and selecting the desired folder.
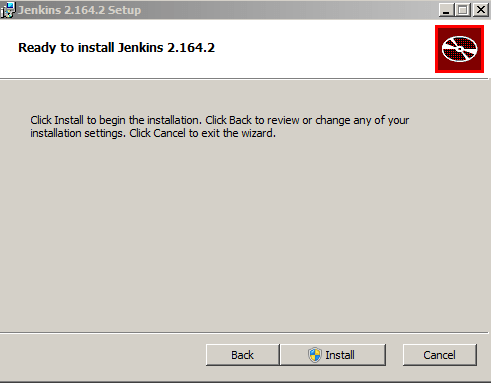
Click on the Install option which requires Windows administrator privileges to start with the Jenkins installation.
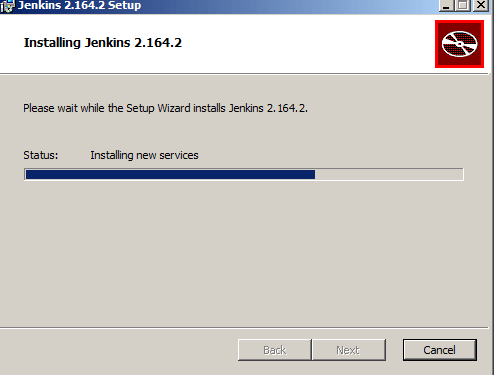
The installation progress will be displayed as in the below image:
Post successful installation completion of Jenkins, you will get screen as in the below image:

Step 2:
As soon as you click on Finish option, you will be redirected to a Web Browser and it will open the Jenkins portal as in the below image:

Step 5:
Once the Jenkins is ready, it will redirect to new screen to confirm the administrator password as in the below image:

The password will be stored in the initalAdminPassword file present at C:\Program Files (x86)\Jenkins\secrets location as highlighted in the above image. Open the file, copy the password without any white-spaces, paste it in the Administrator password field and hit Continue button.
Step 6:
It's time to install the basic plugins required in Jenkins. The screen will provide two options as in the below image. By default Installed suggested plugins will be selected. I have choose the first option but you may select the other option.

Step 7:
Since I have selected the first option as in Step 6, based on that plugin installed will begin. We can see the progress and plugin information as in the below image:

Interesting Fact - You can install / uninstall / update plugins later from Jenkins Management panel too.
Step 8:
Create the first user with Admin role in Jenkins by providing all the details as in the below image:

Step 9:
The default Jenkins URL will be set to http://localhost:8080. You may change the Jenkins URL in the Instance Configuration as in bellow image:

On hitting Save and Finish option, Jenkins will complete the setup & configuration and will re-direct to the Jenkins instance with the Admin user created by you.
Please note that if you are not able to load the Jenkins then please check the Jenkins URL.
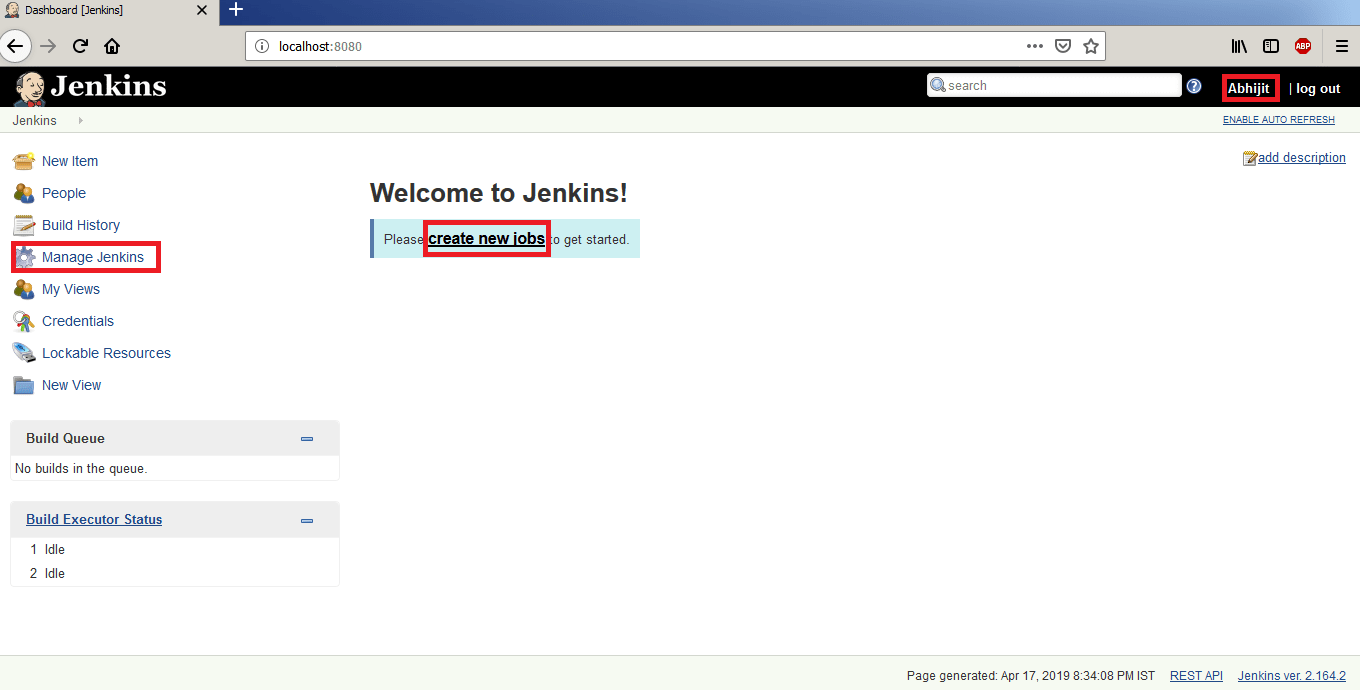
Step 10:
Jenkins will display Manage Jenkins option depending on the role of the user. Here, my user has all the options available.
 To manage Jenkins, click on Manage Jenkins option. As shown in above image, user will get above options depending on the type of role. We will explain each and every option present in Jenkins management area in another post. Till then please support me by sharing the post.
Please use comment section for posting any queries, information. For feedback / suggestions, you can reach me using contact form present at Contact page.

Thanks, it helped me as as beginner